
This comprehensive guide expertly unveils the functionalities of your new EMS Foot Massager, ensuring optimal usage and a masterful control experience for maximum benefit.
Welcome to the user manual, designed to help you fully understand and enjoy your EMS Foot Massager, providing a detailed overview of its features.
What is an EMS Foot Massager?
EMS, or Electrical Muscle Stimulation, foot massagers represent a revolutionary approach to foot care and overall wellness. Unlike traditional massage devices that rely on mechanical action, these innovative massagers utilize gentle electrical impulses to stimulate the muscles in your feet and legs.
These impulses mimic the natural signals sent from your brain to your muscles, encouraging contraction and relaxation. This process can help improve circulation, reduce muscle tension, and alleviate pain. An EMS foot massager isn’t simply a relaxation tool; it’s a therapeutic device designed to address various foot-related concerns.
Effectively, it provides a non-invasive method to enhance muscle performance and recovery, offering a convenient and customizable massage experience right in the comfort of your home. Understanding this core technology is key to maximizing the benefits of your new device.
Benefits of Using an EMS Foot Massager
Employing an EMS foot massager delivers a multitude of advantages extending beyond simple relaxation. Primarily, it significantly improves blood circulation in the feet and lower legs, combating fatigue and promoting overall cardiovascular health. The stimulation helps alleviate muscle soreness, tension, and even cramping, offering relief for those who stand or exercise frequently.
Furthermore, EMS technology can aid in pain management, particularly for conditions like plantar fasciitis and neuropathy. Regular use may also contribute to reduced stress and improved sleep quality, fostering a sense of well-being. The customizable intensity levels allow for a personalized experience, catering to individual needs and preferences.
Ultimately, an EMS foot massager empowers you to proactively manage your foot health and enhance your quality of life.
Understanding Your EMS Foot Massager
Familiarize yourself with the device’s core elements and their specific roles to unlock its full potential and ensure a safe, effective experience.
Key Components and Their Functions
The footpad electrodes are crucial, delivering electrical muscle stimulation to targeted areas; ensure consistent skin contact for optimal results. The control unit houses the power button, intensity adjustment controls, and mode selection options, providing user command.
Intensity level buttons regulate the strength of the EMS pulses, allowing personalized comfort and effectiveness. Mode selection buttons cycle through various pre-programmed massage patterns, catering to diverse needs. The LCD display visually indicates the selected intensity level and massage mode, offering clear feedback.

The battery compartment securely holds the power source, enabling cordless operation. The connecting cables transmit electrical signals from the control unit to the footpads, ensuring reliable functionality. Understanding each component’s role is vital for maximizing your EMS foot massager’s benefits and ensuring proper operation.
Safety Precautions

Always begin with the lowest intensity level and gradually increase it to a comfortable setting, avoiding sudden shocks. Do not use if you have a pacemaker, implanted medical device, or are pregnant without consulting your doctor first.
Avoid using on open wounds, skin irritations, or areas with poor circulation. Never allow children to use the massager unsupervised. Discontinue use immediately if you experience any discomfort, pain, or adverse reactions.
Keep the device away from water and extreme temperatures. Inspect the footpads and cables for any damage before each use. Ensure proper grounding to prevent electrical hazards. Prioritizing these safety measures guarantees a secure and beneficial EMS foot massage experience, protecting your well-being.

Setting Up Your EMS Foot Massager
Prepare for relaxation by carefully unpacking your new device and following the simple setup instructions to ensure optimal performance and a seamless experience.
Begin by inspecting all components and preparing for initial use, unlocking the full potential of your EMS Foot Massager for ultimate comfort.
Unboxing and Initial Inspection
Carefully open the packaging and verify that all listed components are present. You should find the EMS Foot Massager unit itself, the remote control (if applicable), the conductive foot pads, and this user manual. Inspect each item for any signs of damage incurred during shipping, such as cracks, dents, or exposed wiring.
If any damage is detected, do not attempt to use the device. Contact customer support immediately for assistance and potential replacement. Ensure the foot pads are securely attached to the unit or are ready for connection. Familiarize yourself with the placement of the control panel and the foot pad connection ports. Confirm the remote control (if included) has batteries installed or is ready for charging. A thorough initial inspection guarantees a safe and effective user experience, preventing potential issues down the line.
Retain the original packaging for potential returns or warranty claims.
Battery Installation and Charging
Locate the battery compartment, typically found on the underside of the massager unit or within the remote control. Insert batteries according to the polarity markings (+ and -) indicated inside the compartment. Ensure a snug fit for optimal connection. For rechargeable models, connect the provided charging cable to the designated charging port on the device.
Plug the cable into a standard power outlet. A charging indicator light will illuminate, typically red while charging and turning green upon completion. Allow the device to charge fully before its initial use – this may take several hours. Avoid overcharging, as it can potentially reduce battery lifespan. Always use the provided charger to prevent damage to the unit. Proper battery care ensures consistent performance and longevity.

Using Your EMS Foot Massager
Power on the device and select your desired massage mode and intensity level for a personalized experience, enjoying the benefits of EMS technology.
Powering On/Off and Basic Operation
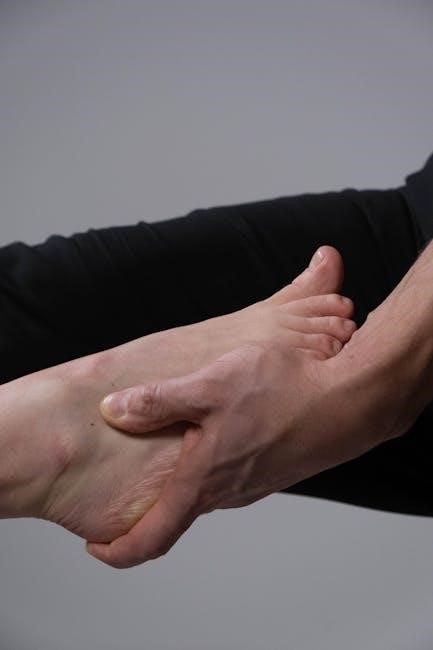
To initiate operation, locate the power button, typically situated on the device’s upper surface or side panel. A single press will activate the EMS Foot Massager, indicated by a lit display or audible tone. Ensure your feet are placed correctly on the conductive pads for optimal signal transmission.
For deactivation, press and hold the power button for approximately two seconds, until the device shuts down and the display turns off. Basic operation involves selecting a pre-programmed massage mode, often cycled through using a ‘Mode’ button. The intensity is then adjusted using separate ‘+’ and ‘-’ buttons.
Always begin with the lowest intensity setting and gradually increase it to a comfortable level. Familiarize yourself with the button layout before use, and refer to the display for feedback on selected settings. Proper foot placement is crucial for effective stimulation.
Intensity Level Adjustment
Precise control over stimulation is achieved through dedicated intensity level buttons, typically marked with ‘+’ to increase and ‘-’ to decrease. Begin with level one, the lowest setting, to assess your personal tolerance. Gradually increase the intensity, one level at a time, until you feel a comfortable, yet noticeable, muscle contraction.
Avoid immediately selecting a high intensity, as this may cause discomfort. The optimal level varies depending on individual sensitivity and foot placement. Pay attention to your body’s signals; if you experience any pain, immediately reduce the intensity.
Remember that the sensation should be strong but not unpleasant. Consistent adjustment throughout the session may be necessary as your muscles adapt. Masterful control of the intensity ensures a personalized and effective massage experience.
Massage Mode Selection
Your EMS Foot Massager likely features multiple pre-programmed massage modes, designed to target different muscle groups and provide varied stimulation patterns. These modes may include kneading, tapping, shiatsu, or a combination of techniques. Mode selection is typically achieved via dedicated buttons on the control panel.
Experiment with each mode to discover which best suits your needs and preferences. Consider the desired effect – relaxation, pain relief, or muscle recovery – when choosing a mode. Refer to the user manual for detailed descriptions of each mode’s specific benefits.
Don’t hesitate to alternate between modes during a single session for a more comprehensive massage. Masterful control over mode selection allows for a truly personalized and therapeutic experience.

Troubleshooting Common Issues
Addressing potential problems is crucial for continued enjoyment; this section provides solutions for issues like power failures, weak stimulation, and deciphering error codes.
Massager Not Turning On
If your EMS Foot Massager fails to power on, begin with the simplest checks. Ensure the unit is adequately charged; connect it to the power source using the provided adapter and allow sufficient charging time – typically several hours for a full charge.
Verify the power button is firmly pressed and held for a moment. Sometimes, a brief press isn’t enough to activate the device. Inspect the battery compartment (if applicable) to confirm batteries are correctly installed with the proper polarity (+ and -).
Check the power adapter and cable for any visible damage, such as frayed wires or a broken connector. If the issue persists, try a different power outlet to rule out a problem with the electrical source. Consult the error code section if a display appears, as it may indicate a specific malfunction.
If none of these steps resolve the problem, contact customer support for further assistance.

Weak or No Stimulation

Experiencing weak or absent stimulation with your EMS Foot Massager often indicates a connectivity issue. First, ensure your feet are making good contact with the conductive pads on the massager’s surface. Dry skin can impede conductivity, so lightly moisten your feet with water or apply a conductive gel.
Increase the intensity level gradually using the control buttons. Start at the lowest setting and slowly increase until you feel a comfortable, noticeable stimulation. Confirm the electrode pads are clean and free of dirt or residue, as this can reduce their effectiveness.
If the problem continues, check for any damage to the pads themselves. Worn or damaged pads may need replacing. Ensure proper battery charge, as low power can diminish stimulation strength. Refer to the troubleshooting section for error codes.
Contact support if issues remain.
Error Codes and Their Meanings
Your EMS Foot Massager utilizes error codes to quickly diagnose potential issues. Error code E1 typically indicates a low battery; please connect the device to the charger and attempt to restart. Code E2 signals an electrode pad disconnection – verify secure pad attachment and proper contact with your feet.
If you encounter E3, it suggests an internal system malfunction requiring professional service. Code E4 often points to overheating; immediately power off the device and allow it to cool before resuming use. An intermittent flashing of all LEDs may indicate a sensor error.
Consult the full error code list in the appendix of this manual for a comprehensive explanation of each code. Do not attempt to disassemble or repair the device yourself if an error code appears; contact customer support for assistance.
Ignoring error codes can cause damage.

Maintenance and Care
Regular cleaning with a damp cloth ensures longevity. Proper storage in a cool, dry place protects the device, maintaining optimal performance and user satisfaction.
Cleaning Instructions
Maintaining hygiene is crucial for a positive experience with your EMS Foot Massager. Always disconnect the device from any power source before initiating cleaning procedures. Use a soft, damp cloth to gently wipe down the foot pads and the main unit, removing any sweat or residue after each use.
Avoid harsh chemicals, abrasive cleaners, or excessive water, as these can damage the sensitive electronic components. A mild soap solution can be used for stubborn stains, but ensure thorough rinsing and complete drying before the next use. Never immerse the massager in water or any other liquid.
Pay attention to the electrode pads, ensuring they are clean and free from debris to maintain optimal conductivity. Regular cleaning extends the lifespan of your EMS Foot Massager and ensures a comfortable, effective massage session every time. Proper care guarantees lasting performance.
Storage Guidelines
Proper storage significantly extends the life of your EMS Foot Massager. When not in use, always store the device in a cool, dry place, away from direct sunlight and extreme temperatures. Avoid storing it in humid environments, which can damage the electronic components.
Keep the massager in its original packaging or a protective case to prevent dust accumulation and accidental damage. Ensure the electrode pads are clean and dry before storing to maintain their adhesive quality. Avoid placing heavy objects on top of the device, as this could cause deformation or malfunction.
Regularly check the storage area for any signs of moisture or pests. Following these guidelines will ensure your EMS Foot Massager remains in optimal condition, ready for your next relaxing and therapeutic session. Safe keeping is essential.